The easiest way to process a raw file in RawTherapee is by using the Auto exposure button in the Exposure section of the toolbox.
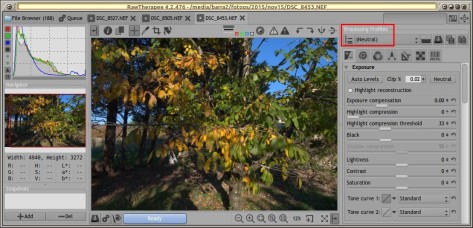
But before we proceed, it is important to know that RawTherapee uses so-called profiles. These are text files that contain certain tool settings that are applied when you open a raw file, like sharpening, noise reduction or automatic exposure. By default the (yes!) default profile is used. That determines which algorithm has to be used to demosaic the raw file, it activates auto levels and applies some sharpening. You can see which profile was used to open a raw on top of the tool window, under Processing profiles. As soon as you touch a slider this changes to ‘Custom’. It is easy to change which profile is used, as it is to make your own ones.
For this guide I prefer to open raw files with a neutral profile, to give you a clear idea of what slider or setting does what.
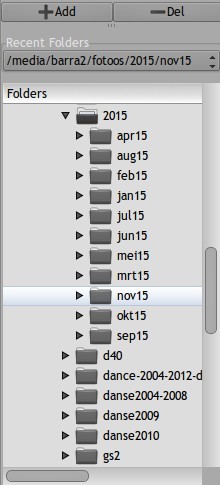
Start RawTherapee. Click on the File browser tab at the top and left of the application window and navigate to a folder that contains raw files.
Double click on it and RawTherapee starts to create thumbnails. The first time this can take some time, later on they are read from cache. Right click on a thumbnail and choose Clear in the drop down menu. That means: do not use the default profile but open the raw file with the neutral profile. The neutral profile only applies some low-level settings like the demosaic algorithm.
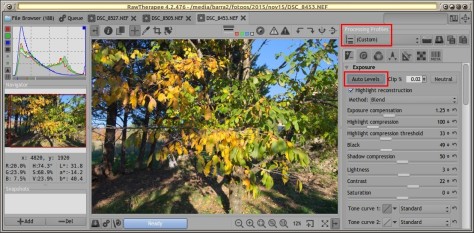
Choose Open from the drop down menu or hit Enter. The raw file opens up in the image window. The Exposure tab is opened by default and the only thing you have to do is to click the Auto Levels button. RawTherapee tries to calculate the optimal settings but as you can imagine, this will not always work. Adjust those sliders to taste.
The raw file opened with the neutral profile…
… and with auto levels applied. Notice how the histogram on the left has changed.
Export
Now we are going to export the raw file to a jpg, tif or png. There are two ways to do this: by hand or via the queue. If you want to give the output file another name than DSC_1000.jpg, for example DSC_1000.autoexposure.jpg, then save the file ‘by hand’ by clicking on the leftmost icon at the bottom of the image window.
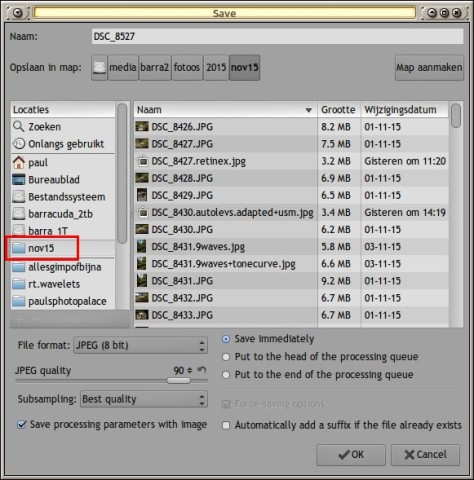
A new window appears where you can set the file type, quality, location and name, among others. Click on OK and you’re done.
[Remark: in subsequent sessions this window shows always the path to the last used folder, not the folder the current file is in. But on the left under Locations you can find a shortcut to the current folder, indicated in red in the screenshot.]
Queue
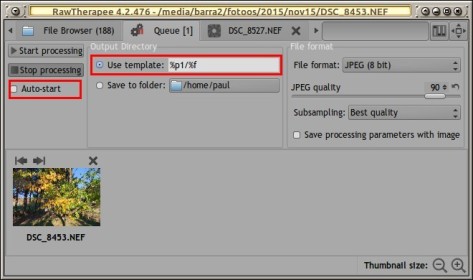
The other way to process a raw is via the queue. Here you can store multiple files and process them all at once with a single click of a button. Before you use this, it’s advisable to visit the queue window to choose the settings you want, like file type, quality, etc.
I always use a so-called template to indicate where I want my resulting files stored: %p1/%f. This means that the raw file DSC_1000.NEF is converted to a file DSC_1000.jpg that sits next to the raw file. To store the file in a subdirectory called ‘converted’, use %p1/converted/%f.
When Auto-start is checked, the processing starts as soon as a raw file enters the queue. If you want to edit another photo, this can be disturbing because your pc is busy processing the first photo and gets slower with the second during a couple of seconds. In that case, uncheck Auto-start, edit all the raws you want, send them to the queue with the middle button at the bottom of the image window and when you’re done, you click the Start processing button.
________
pm|nov15


