Unlike camera jpg’s, raw files are not treated with sharpness filters or noise reduction algorithms for example, so we have to do that ourselves. Although there are more ways to do this in RawTherapee, I’ll just show how to use the basic Unsharp Mask, also known as USM filter.
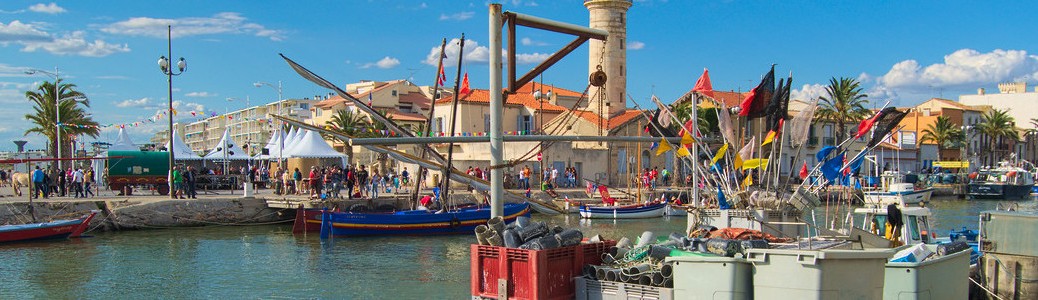
I use the following photo for this demonstration, taken in a little village on the coast of La Méditerranée. It is opened with the neutral profile.

In the Exposure section – the first entry in the Exposure tab – I choose Auto levels to see what that gives. After some fine-tuning with the sliders there, I came up with this.

Perhaps you say “But hey, in the previous article in this guide you advised not to use auto levels?” Yes, that’s right. I said that because it /is/ important that one understands what tone curves do to a photo. But sometimes the results are not what you are after and in that case you can always have a look what auto levels do(es). With this photo I liked it over my tone curve (after touching some more sliders in the Exposure section). Most of the time I get more pleasing results when manually adapting a tone curve, and sometimes the auto levels button plus the sliders around work better. (And sometimes nothing works because the light was bad or the scene was bad or your eyes were bad or closed. That’s why RawTherapee provides a trashcan.)
Unsharp mask
RawTherapee offers several tools to make a photo appear sharper, but here I’ll use only one: the classic unsharp mask, also known as USM. Click on the Detail tab of the toolbox on the right and right click with the mouse on the ‘Sharpening’ entry. All other entries close (fold) automatically and we’re just left with the tool we want. That looks like so.

Two things to notice here, indicated in red in the screenshot. To activate this filter, click on the gray circle (the international ‘power’ symbol) on the left of the word Sharpening and the circle turns black. As you can see at a glance, all the other filters in this section are turned off.
The second thing is the 1:1 label on the right (a bit hard to see, indeed). This indicates that the results of this filter are only visible in the image window when the photo is viewed at 100% or more, or when the preview window is used. As you can see all the filters in this section need a 100% view at least.
To activate the 100% view, click the Z key (for zoom) on your keyboard or click the 1:1 icon on the bottom of the image window. Hit F to show the whole photo again.

Alternatively you can open a new preview window by clicking on the + sign on the right of the 1:1 icon. This is a small window that shows part of the photo at 1:1. Make it smaller or bigger by dragging the corner right under; move it around the screen by dragging the title bar.
When the whole photo is viewed at 100%, you can select a relevant part by dragging the photo with the mouse, or move the red square in the Navigator window.

The screenshots below are made at 200% to better show the subtle differences.
I used the following values for the unsharp mask:
1. off/inactive
2. active with default values (50 for radius and 200 for amount)
3. active with radius 50 and amount 500 (which is really a lot), and
4. the last one again but now with the option ‘sharpen only edges’ checked.


Click on the first photo on the left to see it bigger, then navigate to the others with the arrow keys or the mouse.
As you can see, there is already a noticeable difference between the first two screenshots (off/default). Also when the whole photo is displayed, you can already see a difference. The third one is exaggerated (amount = 500) to show what happens with such high values. The name of the blue boat is better readable but at the cost of extra grain in the shadow areas, for example the blue area around the name of the boat. Also the sky (here not visible) starts to show noisy artifacts. You can lessen this effect by activating the option ‘Sharpen only edges‘, see the last photo.
This basic unsharp mask filter gives usually very acceptable results with the default values or with the amount value a bit higher. Usually I choose 250 for this last value and let radius at 50. I use ‘Sharpen only edges’ sometimes, the other option Halo control seldom. What values you choose here depend also on the number of pixels of your photos, the lenses used, your personal taste and on the output you want: a big print or a just a photo to show on the web.
The Threshold sliders in the Unsharp mask window are not covered here, as those go beyond the purpose of this introduction to RawTherapee.
In short
So in short, to sharpen a photo using the unsharp mask, activate the filter, let radius at 50 and just change the amount value to your liking. There’s just one little rule to follow when sharpening a photo: don’t exaggerate. A spectator may never see that a photo has been sharpened, because if that’s the case, the filter was abused.

pm|dec15
