
The last step in the process of raw conversion is often to apply some form of noise reduction. This can be either used to treat the noise in high ISO images or for low ISO shots to clean up a blue sky.
There are many types of digital noise and many different tools to reduce that noise. RawTherapee provides several ways to deal with noise, but here I’ll use for simplicity’s sake only one tool and within that (complex) tool just two sliders. I use two photos here, one with an ISO value of 6400 and one taken on a sunny day with 100 ISO.
Here’s Kira, one of my cats, trying in vain to hide from my camera, captured at 6400 ISO. The photo was opened with the neutral profile and I applied a simple tone curve.

First I open two detail windows by clicking on the + sign at the bottom of the image window. You can also zoom the whole photo to 100%. Beware that at lower zoom levels (50%, 33%…) you won’t see the effects of this filter, it won’t be previewed. I place one detail window on its eye and one in the shadow area on the left (because noise loves to manifest itself in the shadows). That looks like so.
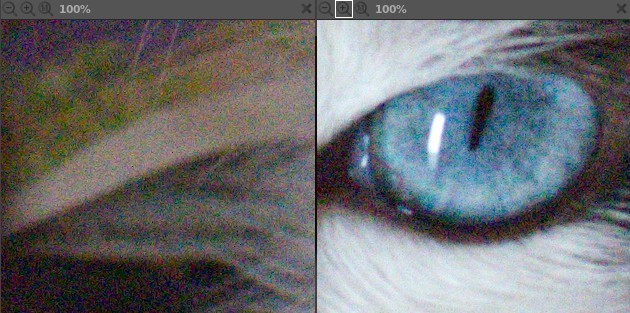
As you can clearly see, there is quite some noise in the photo. This is perfectly normal for a 6400 iso shot with a camera of this class (noise levels tend to be inversely proportional to the price of the camera…). But happily we have with the Noise reduction tool in RawTherapee a powerful instrument to deal with this. Click on the Details tab in the toolbox and right click on the Noise reduction entry, and you’ll see this.
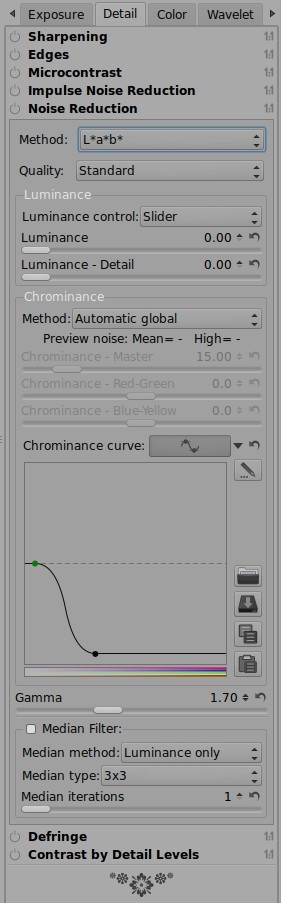
Well, that looks impressive, isn’t it? But don’t worry, we are going to use only the upper part of this tool.

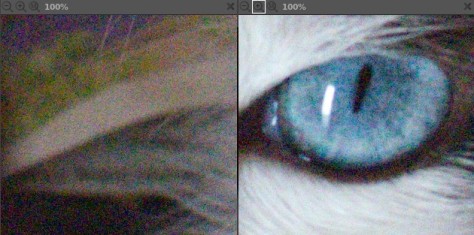
Once activated, the preview windows show already a little difference, but the effect becomes clear when we move the Luminance slider to a value of 20. Click on the photo to toggle with the screenshot before where the luminance slider was at 0.

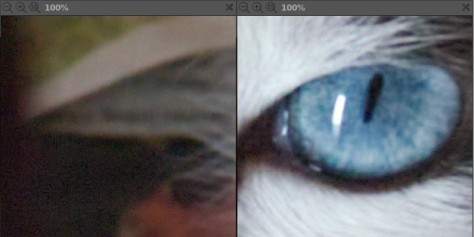
Moving the luminance slider more to the right makes the noise reduction stronger, but at the cost of losing details. You can counteract this with the Luminance – Detail slider, that works a bit the opposite way. Higher values keep details better intact, but the noise is also better visible. For the screenshot below I used a Luminance value of 100 and a Luminance detail of 50. Click on the screenshot and you can compare it (use the arrow keys or the mouse) with the two other screenshots above.
The trick is to find the right balance between the two. My standard values for this filter are Luminance 20 and Detail 50.
Below two 1:1 cropped 1200px versions, the first without noise reduction, the second with NR activated. Sliders for Luminance and Luminance – Detail both at 50.


Or see them bigger on my Flickr account via the link below. Click on one of the photos to see them bigger. Tip: use the diagonal arrow upper right to enlarge the photo further, hit F11 to see it full screen. Navigate between the two with the arrow keys.
Cleaning up the sky
Noise is everywhere in digital photography, even at low ISO settings. To see that, you must well zoom into the photo. This is a typical holiday scene, taken at 100 ISO.

At 100% I see already some irregularities in the sky, at 300% it becomes evident. It is easy to repair this with the noise reduction tool, just set the Luminance slider to 25.


The good news is that this noise reduction filter does not touch the sharpness of the photo in a major way, provided you don’t use extreme values.
In short
So, to reduce noise in high or low ISO shots with RawTherapee, activate this Noise reduction filter and just move the Luminance slider to the desired position. Easy after all, isn’t it? Don’t forget to zoom in to 100% or higher, otherwise you won’t see the effect in the image window, or use the preview window.

pm|dec15
