
In this Beginners’ Guide we have used two filters with certain slider settings. To avoid that you must touch these sliders with every new photo you open, you can save these settings in a so-called profile (that’s a preset). This is very easy, as shown below.
A profile is a text file that contains the values of the settings you used to tweak your photo. It works like so. Open a photo called for example DSC_1000.NEF in RawTherapee, click the Auto levels button in the Exposure tab and close the photo. In a file manager you can see that next to the file DSC_1000.NEF there’s a new file called DSC_1000.NEF.pp3. If you open this, you’ll see somewhere at the beginning the entry [Exposure] and on a new line ‘Auto=true’.
When you open the photo again, you’ll notice that Auto levels is activated. That means you can edit a photo, close it and next time you’ll open the photo, you can go on from the point where you left it. When you save (converse) the photo, you’ll see another file called DSC_1000.jpg.out.pp3, next to the converted file DSC_1000.jpg. If you open this jpg one year later, it will be opened with the same settings, so you can always check how you tweaked the photo.
There’s one potential problem here though. As the developers do not stop to add new functionality to RawTherapee, there is a risk that existing tools get new options or simply disappear. So forward compatibility is not guaranteed.
The making of… a profile
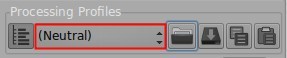
Let’s make a new profile that contains some of the settings I used in this guide. Open a raw file and apply the neutral profile.
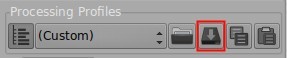
Then go to the Exposure tab in the toolbox on the right and choose in the Exposure section Tone curve 1, Control cage. The tone curve is visible now. Then click on the Detail tab, activate the Sharpening tool by clicking on the power symbol left of it and set Amount at 250 for example. Activate the Noise Reduction filter and give the Luminance slider a value of 20. Click on top of toolbox on the Save profile as button, indicated in red here.
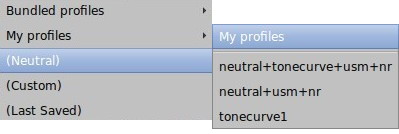
Give it a name, for example neutral+tonecurve+usm+nr.pp3 and save it. Now, whenever you open a new photo, you can apply this profile either by hand by choosing it from the drop down menu under Processing profiles. You’ll see the newly created section My profiles with our profile.
If you apply this to a new photo, notice as well that the tone curve is already opened, and that the Sharpening and Noise reduction tools are activated with the values you set. This greatly reduces the click-click part of editing a photo.
Auto
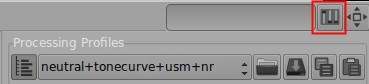
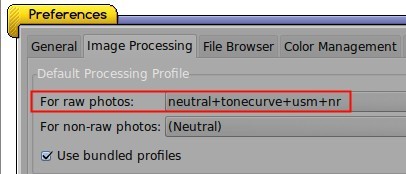
If you want that all your photos open with this profile, click on the Preferences icon somewhere on your screen (depends on the layout you use). On my screen it’s top right, indicated in red.
Click in the window that appears on the Image Processing tab and say that raw files must be opened with the neutral+tonecurve+usm+nr profile.
If you open a new photo and the results disappoint you, then simply choose another profile like Neutral or Default.
That golden profile!
Once you get the grasp of it, I’m sure you are going to look for the ultimate profile that opens all your photos in the very best possible way. Well go ahead, but I’ll tell you one little secret in advance: that does not exist! Every light and every situation need their special treatment.
Bundled profiles
Don’t forget to have a look at the bundled profiles that come with RawTherapee, to be found in the same place as the neutral and default profiles. One of the profiles that might be of interest is the Default ISO High profile, that uses another demosaic algorithm (lmmse versus amaze) that is said to better treat high iso noise. But that’s for pixel peepers!

pm|dec15
