
Sometimes you want to retouche a portrait to mask or ‘de-accentuate’ temporarily irregularities like little pimples, often seen on the skins of teenagers. This is easy when using GIMP and G’MIC in tandem, as shown below.
In this context we can say that a skin has three characteristics: a structure, some irregularities like a mole or birthmark that are integral part of the face and make up one’s personality, and some irregularities that are gone after a week or a month or a year. My preferred method to deal with this last group is to treat them with the Make up filter in G’MIC.
Here’s a portrait of my daughter Joséphine who has this typical teenager skin, especially on her forehead.

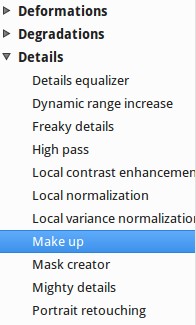
In the menu bar in GIMP, click on Filter, then G’MIC. Go to the Details tab and choose Make up.
And just use the default values, like so.

This is a 100% view of the original photo.

There are three areas of importance here. Of course we want to treat the forehead, but without washing out the skin structure between the eyebrow and the eye, while keeping intact the very fine veins in the eye. By the way, this photo was taken with a Nikkor 1.8/50 lens, that’s why the sharpness is ‘not bad’. I used RawTherapee to apply a tone curve and a 1:1 crop, then I sent it to GIMP, so there’s no sharpness filter used at this point.
When we activate the preview with default settings and choose for Preview type ‘Backward vertical‘, the preview looks so.

The skin on the forehead looks already better.
But if we change the Preview type to Forward vertical, we see that the veins in the eyes start to loose detail and that is not what we want.

Select!
So we must apply this filter only to certain areas and let others untouched. We can do this by making one or more selections.
I use the Free select tool (the lasso) in GIMP’s toolbox…

… and I select the following area.

If you want to add another area to the selection, press the Shift key. You’ll see a little plus sign next to the lasso.
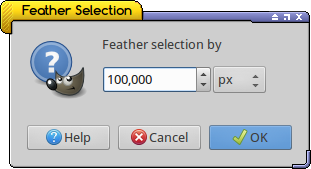
Then I choose in the menu Select – Feather and use a value of 100 (this depends on the number of pixels of the photo). This is the transition area in which the force of the filter decreases to the border of the selection, to avoid abrupt transitions.
I apply again the Make up filter with default values and now the forehead looks better, while the skin structure and the veins stay untouched. Use Ctrl-F to repeat the filter one time or more.

Layer
When we use this method in combination with a layer, we get more visible control. That’s as easy as this.
Open the photo to be treated and duplicate the layer. Use the Layer window for this (Ctrl+L) and click on the duplicate icon at the bottom of the window (indicated in red here), or hit Ctrl+Shift+D to do the same.

After that the window looks like this.

Activate the new layer (it gets blue on my system) and use the lasso tool again to make one or more selections, and feather them. When done, apply the Make up filter once or several times on the selection. Use the opacity slider in the Layers window to change the strength of the filter: at 0 the filter isn’t applied at all, at 100 at max. Click on a photo below and use the arrow keys or the mouse to switch between the two.


Note 1. G’MIC offers a second skin retouche option in the Details section, called Portrait retouching. This filter offers many options and sliders, but it is quite slow. Looking at the results I still prefer the simple (and fast) Make up filter, but your mileage may vary.
Note 2. G’MIC offers in the Repair section a dozen of Smooth filters. Although some of them produce interesting results, they are not made to deal with skins but are better suited for smoothing artifacts in blue skies or to deal with high iso noise.
________
pm|dec15
