As the new wavelet tool with all its sliders and options seems intimidating, it might be a good idea to cut this tool in pieces and investigate every element in detail to find out what they do. One of the reasons why wavelets are difficult to understand is that a setting somewhere might influcence an effect elsewhere. In other words, you have edited a photo to your liking, you change again one more slider and the result changes drastically, for the better or the worse.
Please note that this little guide is written by a user of this software, not by a developer.
In order to understand how to use wavelets, we first need to understand what they are and what they do. Once the concept is a little bit more clear, I will show how to process a raw file using the wavelet tool only.
What is a wavelet?
When you decompose a photo using the wavelet tool, you decompose that photo into ‘levels of detail‘. Otherwise said, you create a kind of layer – it is called a wavelet level – that contains only the very finest details of the photo (level 1), another layer that contains the finest details (level 2), another level with a bit less fine detail (level 3), et cetera, up to the maximum level of 9. The minimal number of levels is 4. Together with the wavelet decomposition comes a so-called residual image. This contains all the information that is not in the individual levels. The residual image plus the wavelet levels contain all the information of the original image. Confused? You’re not alone, this indeed is hard to imagine.
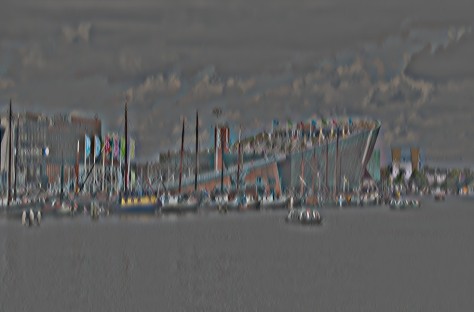
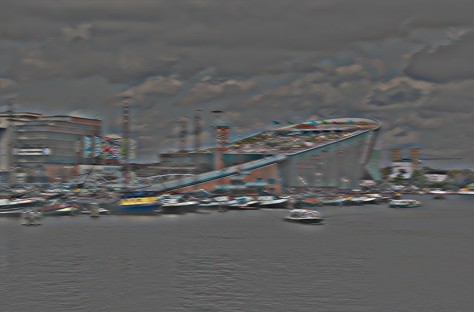
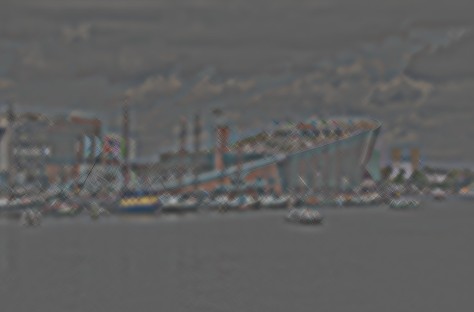
Have a look at the Wavelet Settings in the wavelet tool, after having opened a photo in RawTherapee. Set Background to Grey, for Process choose One level and say it must show for example level 7. Instead of All directions, choose Vertical. That gives this.
Little waves or wavelets indeed!
Choosing horizontal and diagonal gives this.
Try the other levels as well.
What is it good for?
Okay, very interesting but what is it good for, you may ask. The wavelet approach means that we can act – sharpen, denoise, colorize, etc. – on individual detail levels, without touching other levels. We can reduce noise in the sky while sharpen other details in the same sweep. We can reduce irregularities on a portrait’s skin, while accentuating other parts of that same face. We can dramatically change the appearance of a landscape by only touching the residual image’s shadow and highlight sliders.
Let’s go
Here I use a photo that I took in the center of Amsterdam. The ‘boat’ you see is called Nemo, the city’s educative science center. It is designed by the Italian architect Renzo Piano, who also made Le Centre Pompidou in Paris (together with his British collegue Richard Rogers). If you like you can download this raw file (NEF, 13MB) from my Flickr account. No, I see now that Flickr doesn’t accept raw files, so pick it up from my Dropbox account.
Open this photo in RawTherapee and apply the neutral profile at the top of the right panel.
The photo looks like so.
A bit dull of course, as this is the plain raw file without any corrections. Do not touch any of the controls in the exposure section or elsewhere, we are going to process this file using only the wavelet tool. Click on the wavelet levels tab and you’ll see the following entries. If you are in a hurry to start using wavelets, jump down to the section Edge Sharpness.
On top, Strength. A value of 100 means that the corrections you made with this tool are fully applied. 0 means that you see the original photo. It might be a good suggestion to always use this slider to fine-tune the resulting image.
Wavelet levels. Important setting, here you say how many levels you want to have. The higher the number, the more resource intensive (cpu, ram) the filter will be and the more intermediate steps you have at your disposal. You can change the number of wavelets on the spot. Using more or less levels can have an important impact on the photo. When and why use less or more levels still has to be investigated…
Tiling method: use Full image except when you are short on ram memory.
Edge performance. The D4 stands for a certain quality level. Those D’s come from Ingrid Daubechies, a Belgian mathematician (see Wikipedia). Her wavelets are a bit more complex and powerful than the ones used in the command line raw converter dcraw and in GIMP (after installing gimp-plugin-registry). The range is from D2 to D14, where D14 is often the best (but that depends on the photo as well, according to the tooltip).
Preview settings is all about the way the preview is shown, we have just seen samples of that. Use ‘All levels in all directions’ for your final conversion.
Where to start?
For now we leave the rest of the settings as they are (that means inactive) and we move forward to process out first wavelet photo. That brings us to the question: Where to start? The wavelet window seems to suggest that one starts on top (number of wavelet levels) and works all the way down to the last entry, the Final Touchup. But nothing prevents you to work the other way around: start with the Residual image and work up to Contrast. I guess it is a good idea to do the Final Touchup always as the last step.
You can use the wavelet tool and nothing else to produce attractive looking images, but of course you can combine its settings with all the other tools that RawTherapee provides.
Edge Sharpness
Because we don’t know where to start, let’s start with sharpening the edges. This tool works on the levels with the finest details, so 1, 2 and perhaps 3. Click on the little triangle on the left of it to open this entry. You’ll see this.
As you can see by the horizontal grey lines, this tool is divided into three sub-sections: Strength/Radius/Detail plus First level, then Local contrast with a curve and Edge detection. Let the last one unchecked for now.
Open a preview window in the image window of RawTherapee by clicking on the + sign at the bottom of the window. Place the red square (the magnified area) slightly left of the center until you see the letters ‘Conservatorium van Amsterdam’.
As a reference, we apply the standard sharpening filter that can be found under the Detail tab: the Unsharp mask with default values of 0,50 for Radius and 200 for Threshold. Looks like this.
Deactivate the unsharp mask and go back to the wavelet tab where Edge Sharpness is folded out. Change Strength to 1 and you’ll see already a slight change . Move the slider slowly up to 100 and see how the sharpness increases. Values higher than 30 distort the letters. Set strength at 10, leave Radius and Detail at their default values.
First level: here you can choose how the Edge Sharpness should work on the first level with the finest details: reduced, unchanged or reinforced. It does the opposite action on Level 2, according to the tool tip. Set Strength to 40 to see clearly the differences between the three settings. Reset Strength to 10.
Local contrast
Take the middle node (the black point) in the local contrast curve and move it up.
As you can see the overall local contrast is increased, but not so much the letters. Reset the curve by clicking on the little left pointing arrow next to the dropdown menu. This time we take the node on the right side and move it up.
Looks better, isn’t it? Apparently the right node only applies local contrast to the lighter parts of the image.
Again the detail window with the USM filter like we showed above, the difference is clear!
But this is not all. Check the option Edge detection, you’ll see three new sliders and the image looses some sharpness. Move the Gradient sensivity slider to the left and the image sharpens again, though very little. Take care here, the noise in the sky is also amplified. That’s what the other two sliders are for, have a look yourself.
Threshold sliders
Instead of curves you can use the threshold sliders by selecting them as the local contrast method. Moving the sliders to the left decreases the local contrast, moving them to the right increases it. Hold the Shift key to move the individual control points.
Here is the original file with the neutral profile scaled to 1600px wide, with under the result of our wavelet edge sharpening exercise with curves. Notice that the result is already quite good with only this tool. The last photo is processed with the local contrast sliders instead of curves. The overall look is different from the photo in the middle. This is one thing that one has to learn when working with wavelets: don’t stare yourself blind on several detail windows, always have a look on what a filter does on the whole photo. The difference can be dramatic!
You can compare the three photos on my Flickr account. Navigate between them with the arrow keys, hit Z to zoom in and out. If you’re on mobile, click this link instead of the photo under: https://flic.kr/s/aHskp22Vkv.
The other parts of the Wavelet tool will be covered somewhere in the future.
________
pm | jul15


